
Yosemite is basically a cheat code for epic photos: granite walls, waterfalls, glowing sunsets, and viewpoints that look unreal even on a phone. The only problem? There are so many iconic spots that it’s easy to waste time bouncing around without a plan.
Here are the five Yosemite photography locations that deliver consistently jaw-dropping shots—plus exactly when to go, where to stand, and what to pack so you leave with keepers (not just camera-roll clutter).
Top 5
1) Tunnel View (The Classic Valley Icon)

For the “I’m really in Yosemite” shot—El Capitan on the left, Bridalveil Fall on the right, Half Dome in the distance—start here. Go at sunrise for softer light and fewer people, or sunset for drama (bring a small tripod and arrive 30–45 minutes early for a spot at the wall). In winter, the viewpoint can be icy, so wear grippy shoes and pack gloves for chilly waits. If you’re visiting in peak season, enter the park early to avoid traffic stacking up at the turnout.
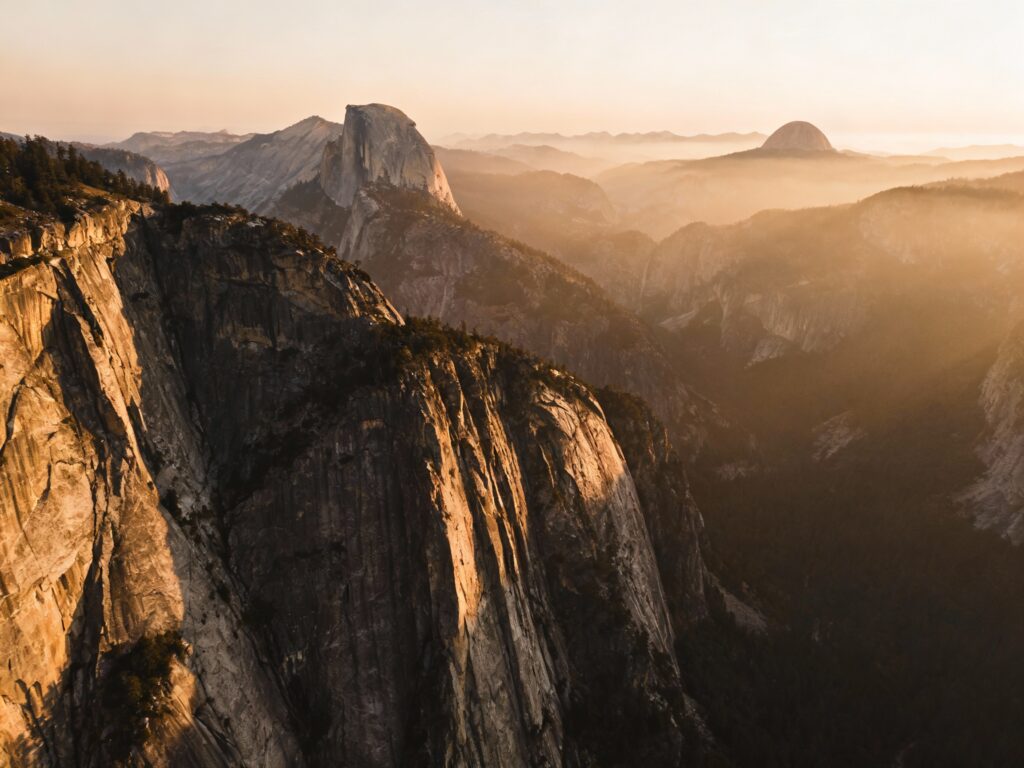
2) Glacier Point (Biggest Wow Factor with the Least Effort)
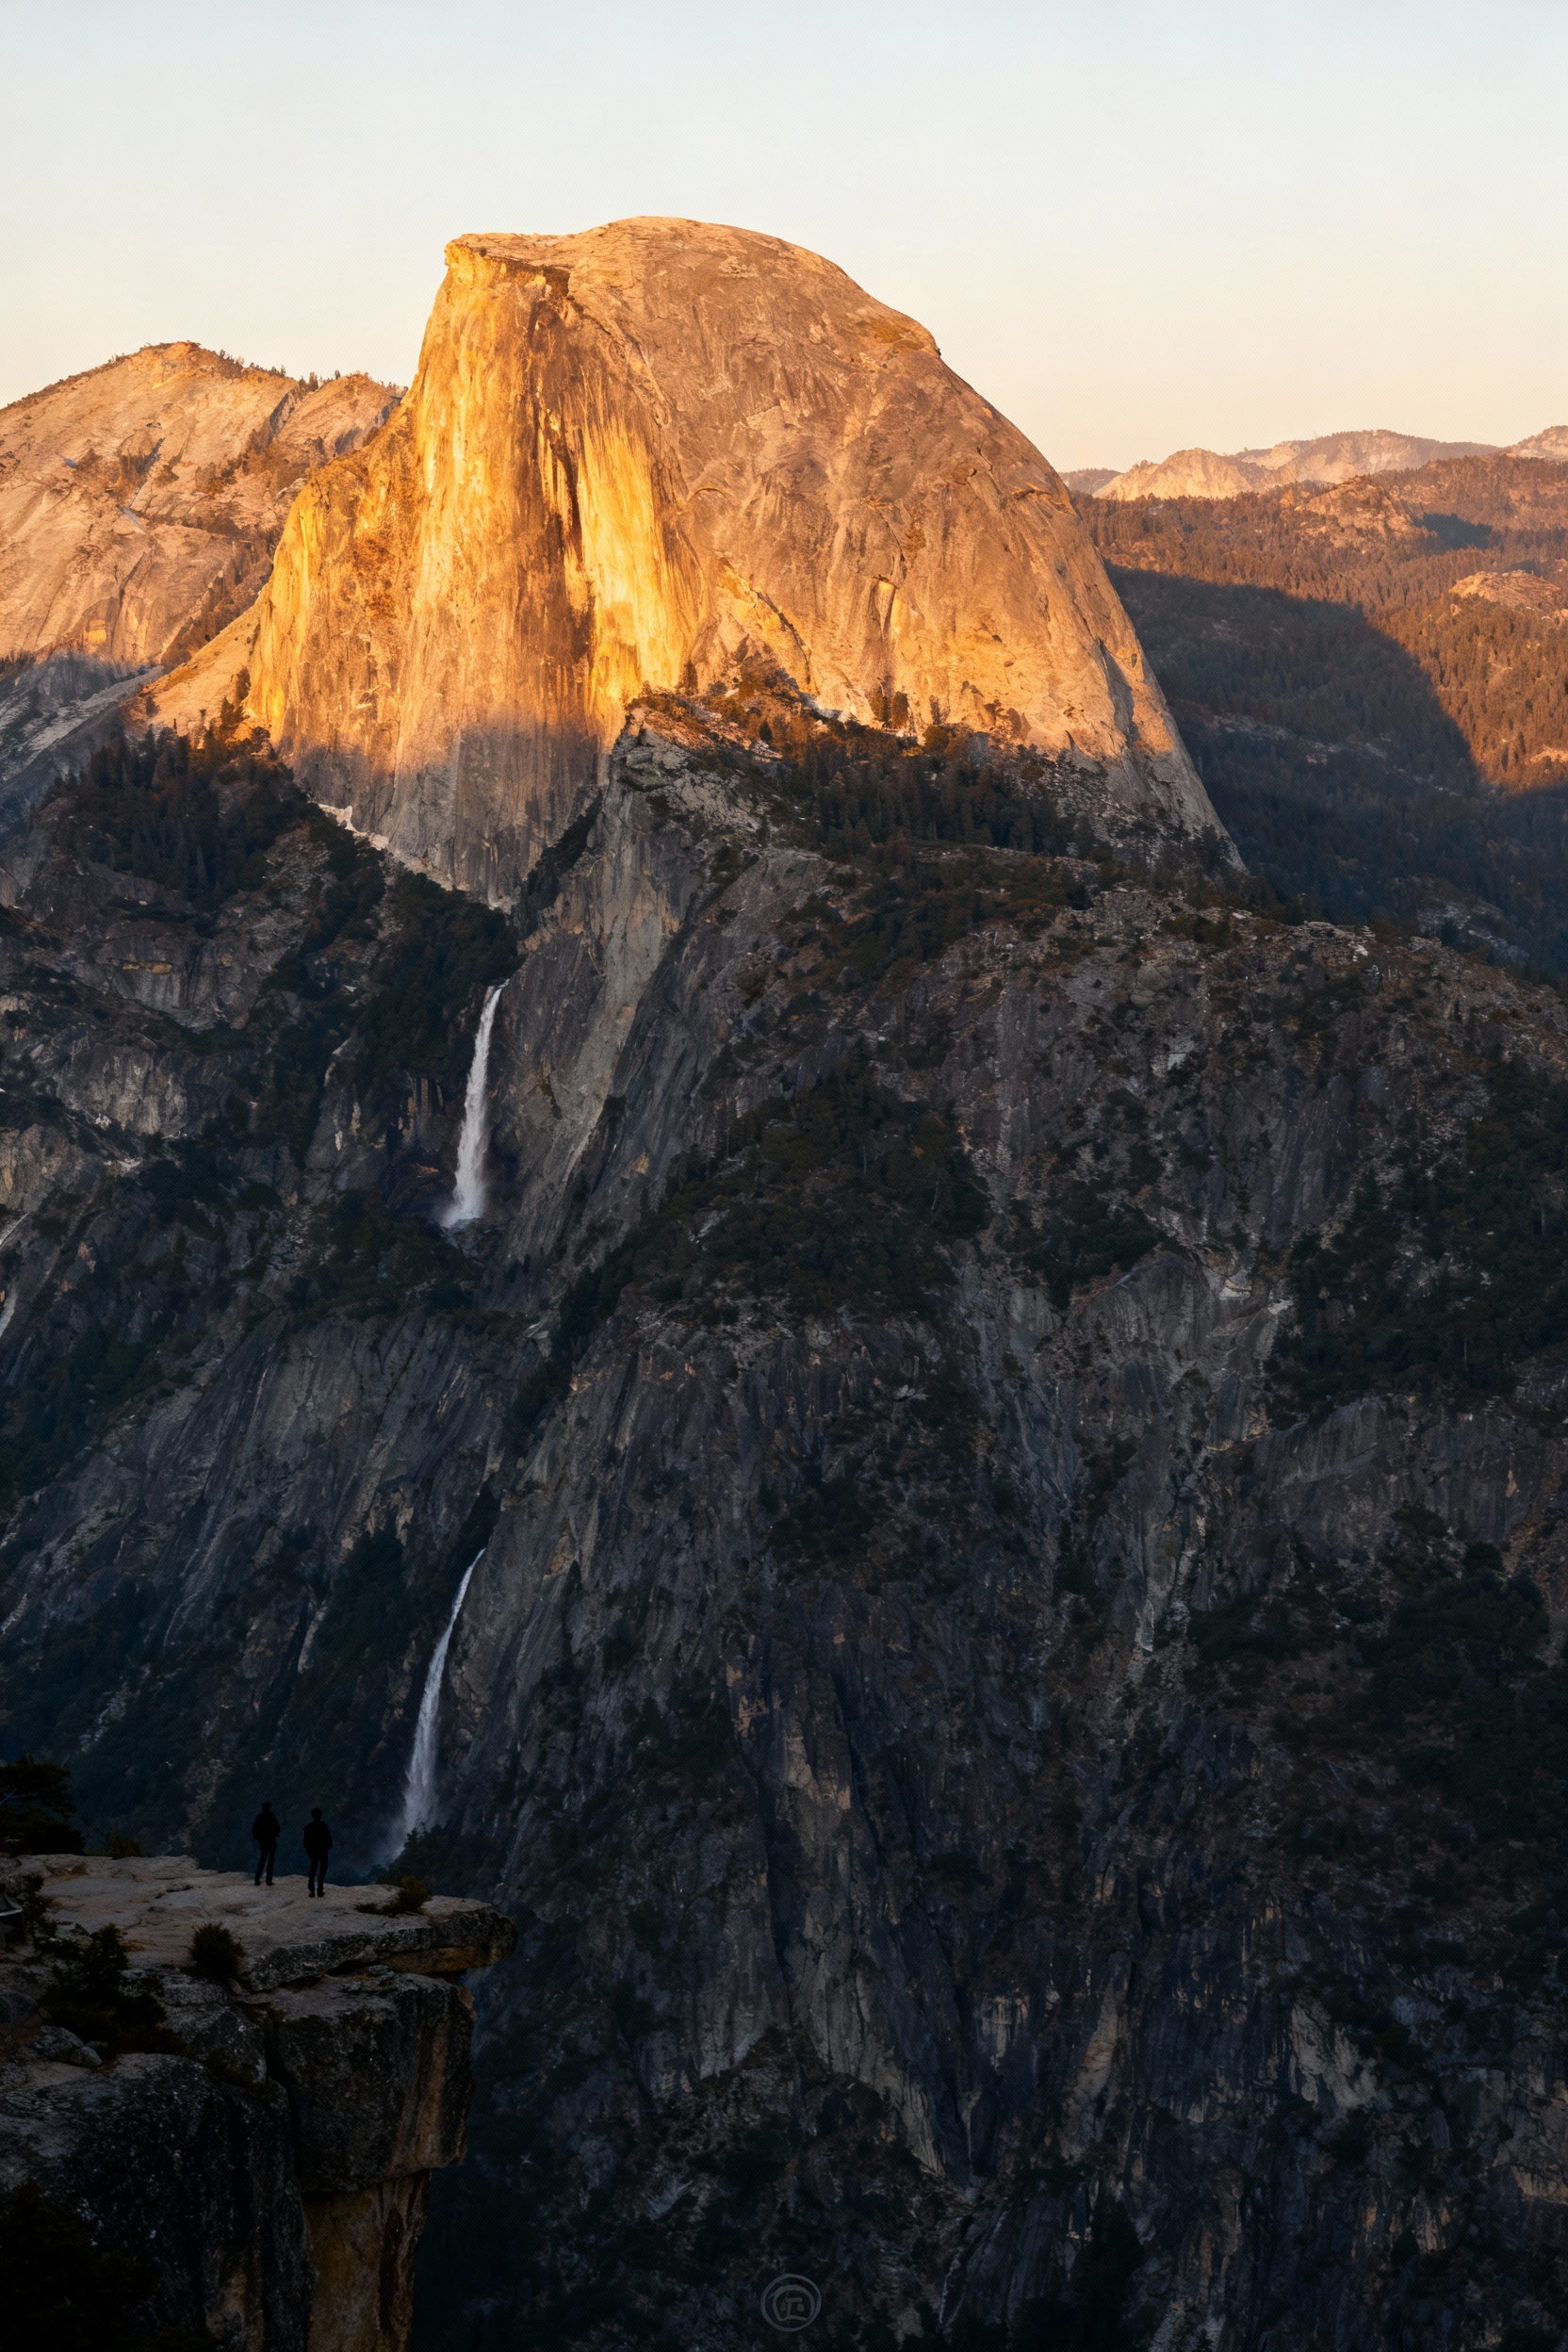
Glacier Point serves the most panoramic, jaw-on-the-floor views: Half Dome feels close enough to touch, and you can frame Nevada Fall in the same scene. If Glacier Point Road is open, aim for golden hour and stay through twilight—blue-hour shots here look clean and cinematic. Pack layers because wind up top can be intense even on warm days, and bring a headlamp if you plan to linger after sunset. If you’re going in summer, check road status and shuttle options early so you’re not stuck reworking your plan last minute.
3) Cook’s Meadow Loop (Easy Half Dome Reflections + Wide Valley Vibes)
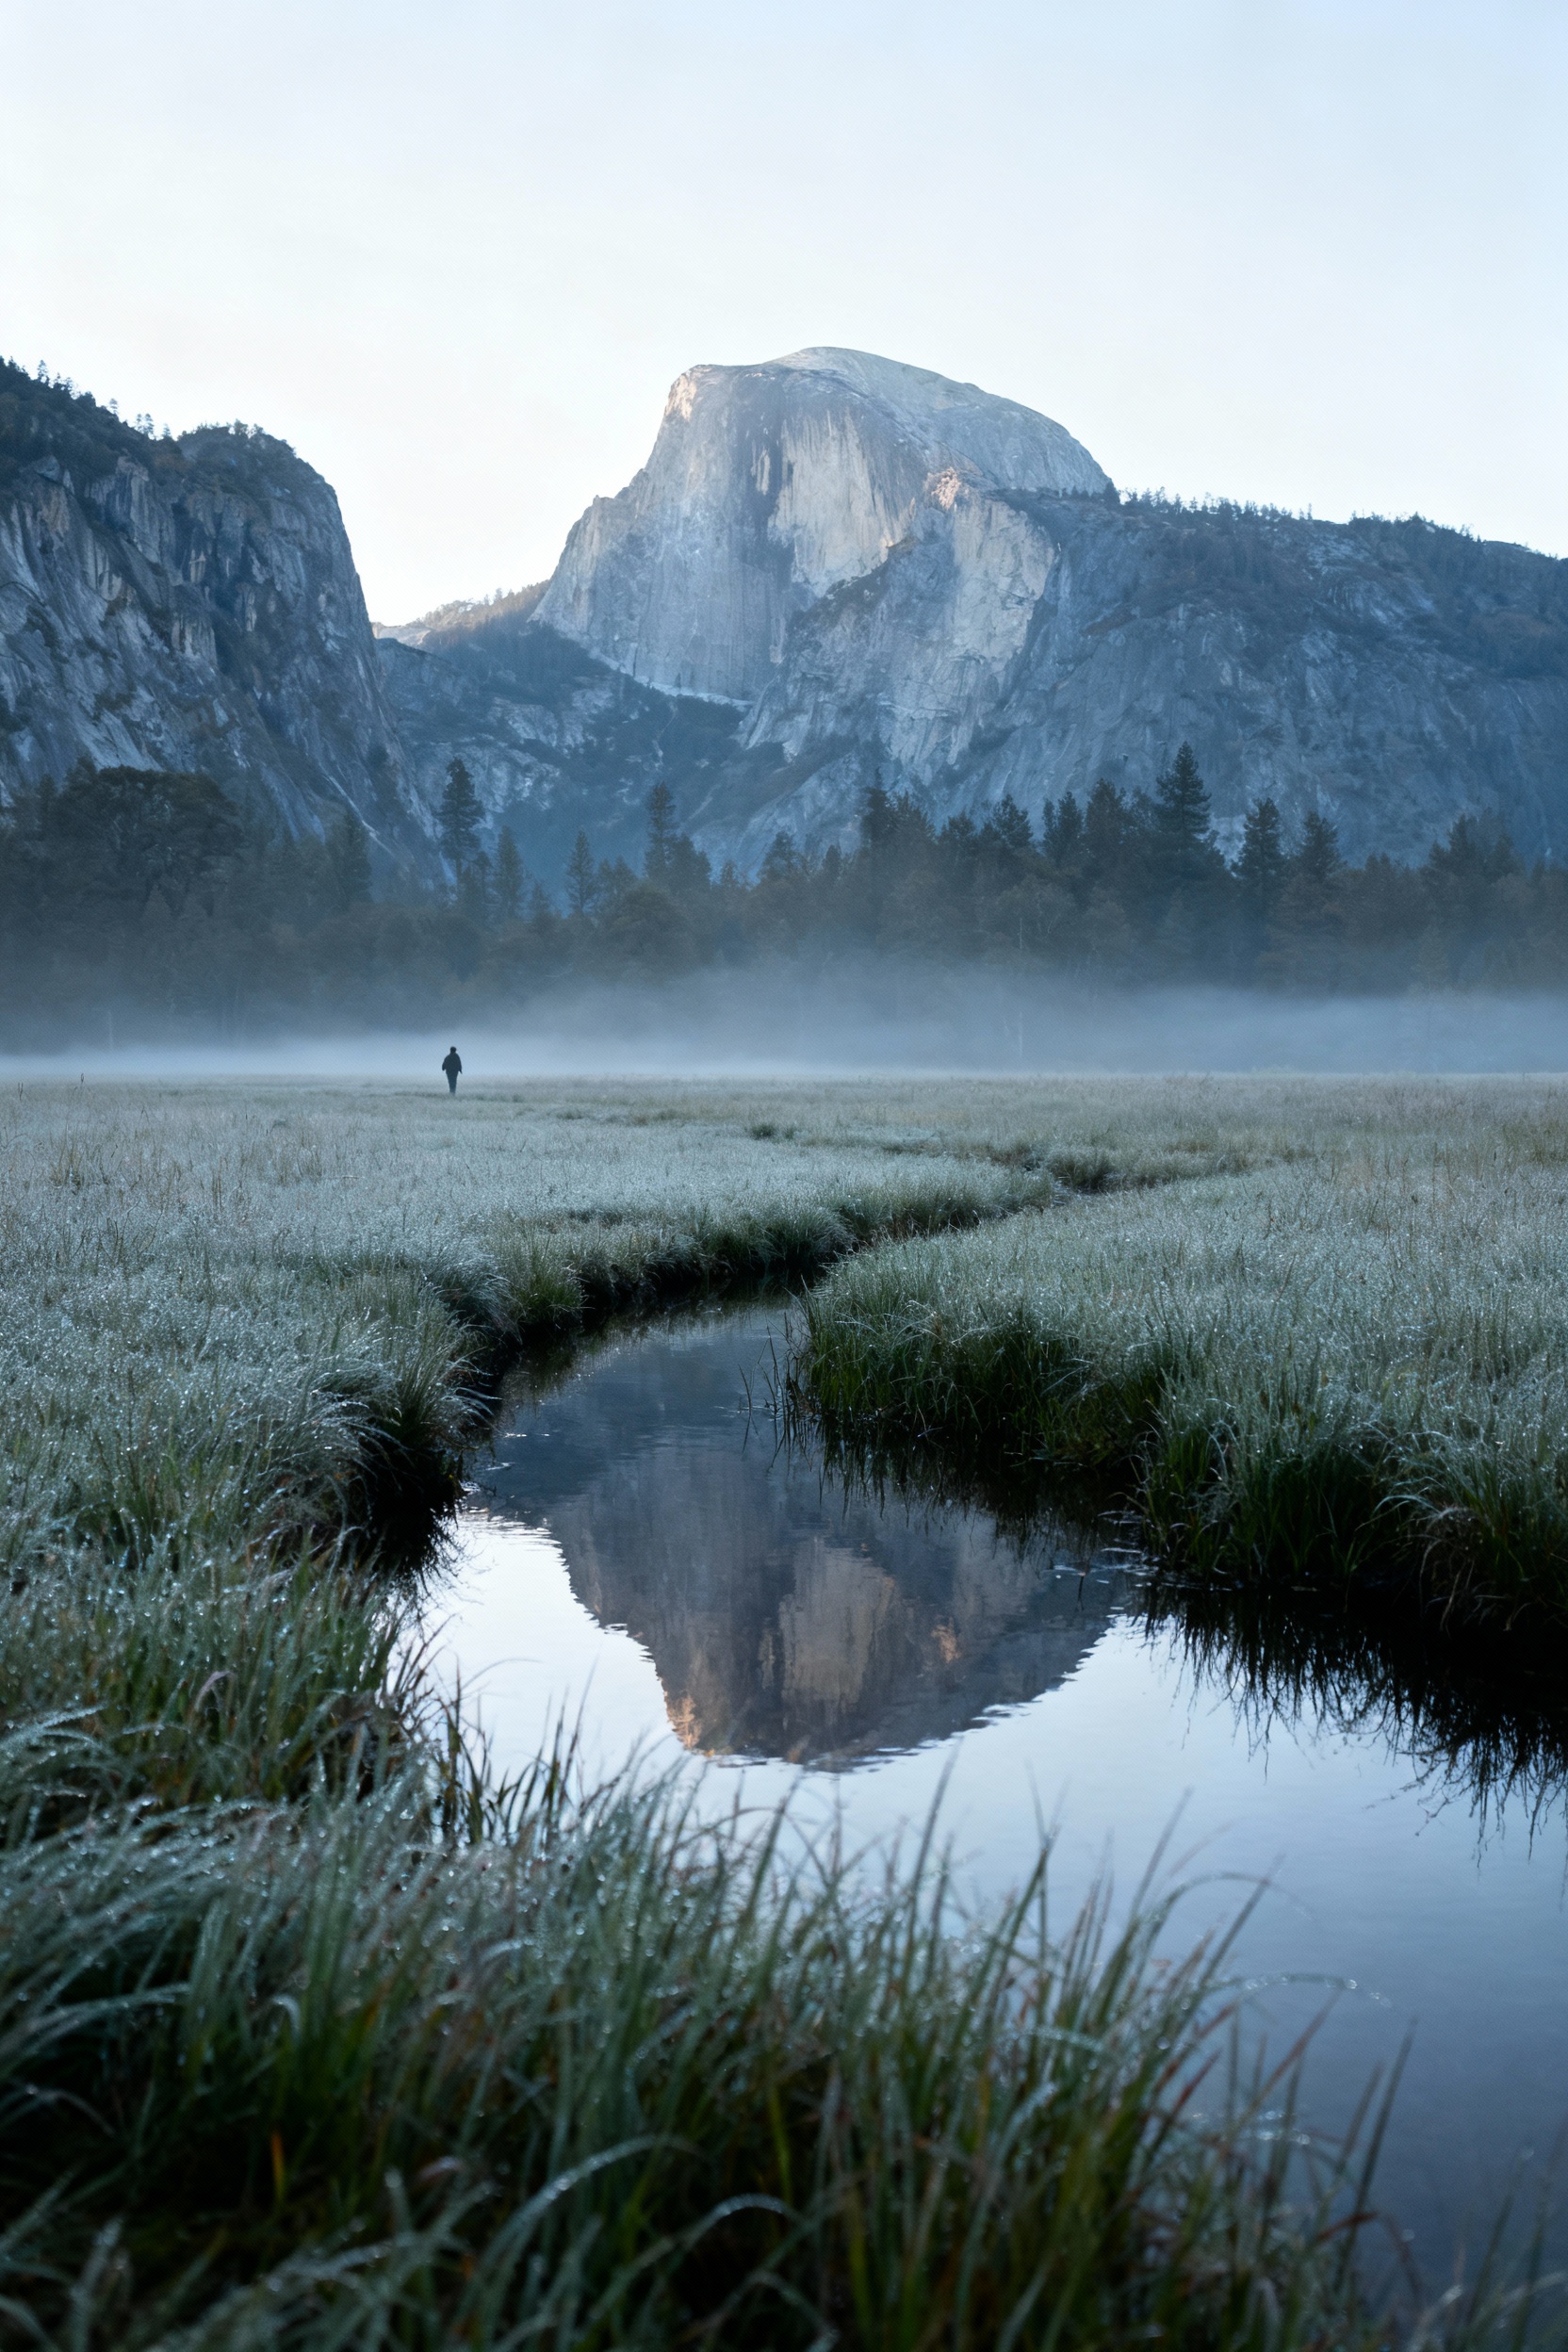
This is a first-timer-friendly spot that delivers huge results with minimal hiking—think open meadow, big skies, and classic Half Dome views. Go early morning for calm air (better reflection chances) and side-light that makes the cliffs pop, then walk slowly and look for boardwalk angles that clear the tall grasses. A polarizing filter helps cut haze and deepen the sky, but even a phone works great if you tap to expose for the highlights. Stay on the boardwalk to protect the meadow (and to keep your shoes from getting wrecked).
4) Sentinel Bridge (Best Simple Half Dome Composition)

Sentinel Bridge is the “clean composition” spot: Half Dome lined up above the Merced River with pine trees framing the scene. Sunset is iconic here, but if you want fewer crowds, try late morning when traffic is lighter and you can still grab crisp detail shots. Bring a mid-range zoom (or use portrait mode on your phone) to compress the scene and make Half Dome feel bigger. In spring and early summer, the river level can add extra sparkle—just watch your footing near the edges.
5) Mist Trail to Vernal Fall (Waterfall Action Shots)
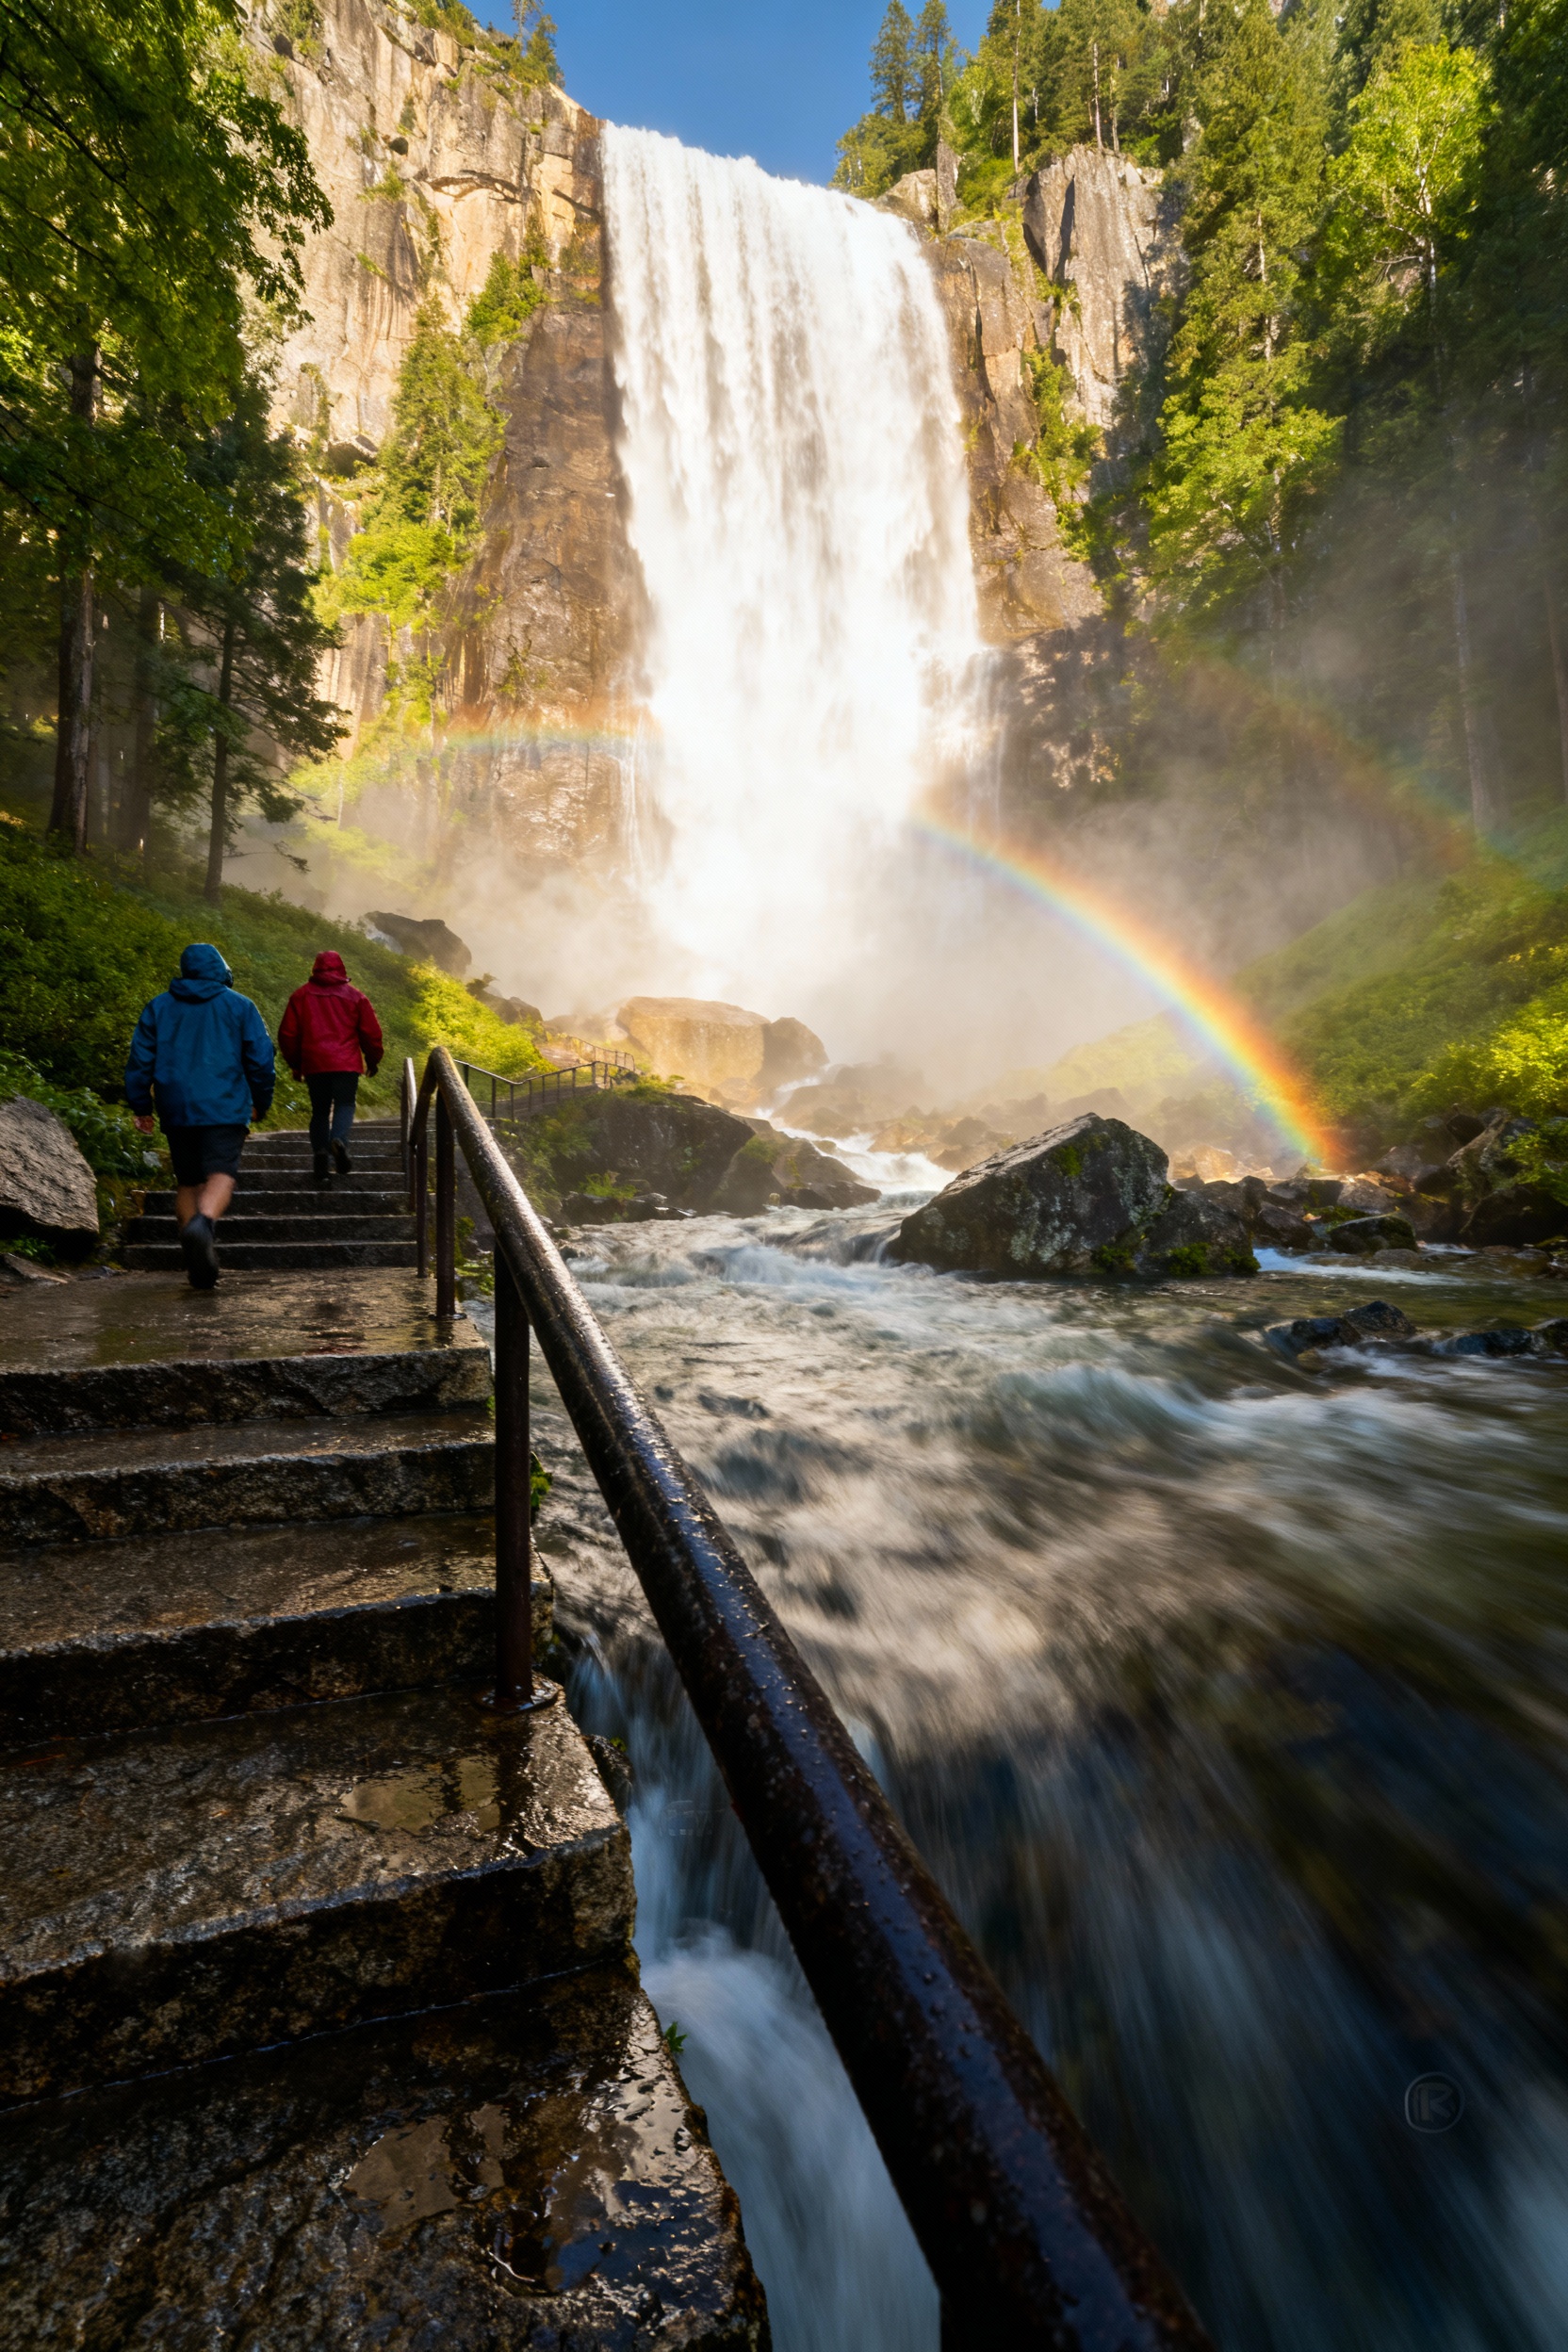
If you want movement and energy in your Yosemite photos, the Mist Trail is the one—misty switchbacks, roaring water, and rainbow chances on sunny days. Start early to beat both the heat and the crowd, and pack a lightweight rain jacket or poncho plus a microfiber cloth to keep your lens from turning into a blurry mess. For silky water shots, use a tripod and a slower shutter (or a phone long-exposure mode), but keep your gear secure because the rocks get slick. This trail is popular for a reason, so plan on parking early or using the shuttle depending on the season.
FAQ
What’s the best time of day to photograph Yosemite?
Sunrise and the last 1–2 hours before sunset are your best bets for soft light, depth, and fewer harsh shadows. Tunnel View and Glacier Point especially shine at golden hour, while Cook’s Meadow can look amazing in early morning with calmer air. Midday can still work—just focus on forests, waterfalls, and tighter compositions instead of wide, contrasty landscapes.
Do I need a tripod in Yosemite?
Not required, but it’s a huge help for sunrise/sunset, waterfalls, and blue-hour shots. A small travel tripod is enough for viewpoints like Tunnel View and Glacier Point, and it’s ideal for long-exposure water on the Mist Trail. If you don’t want to carry one, use railings carefully, steady your phone/camera on a flat surface, and shoot bursts.
When are the waterfalls strongest for photos?
Generally, spring through early summer is peak flow because of snowmelt. By late summer, some falls can slow down significantly, depending on the year. For the best conditions, check recent trail reports and current water flow updates before you go, and aim for morning light to reduce glare.
Do I need reservations to enter Yosemite?
It depends on the season and current park management rules, which can change year to year. Always check the official National Park Service Yosemite page before you book lodging or plan a day trip. Even without an entry reservation, parking and traffic can be intense—arriving early is your best strategy.
What should I pack for a Yosemite photography day?
Bring layers (weather changes fast), water, snacks, sunscreen, and a headlamp if you’ll shoot sunrise or stay after sunset. For gear, pack extra batteries, a lens cloth, and a small power bank for your phone. If you’re doing the Mist Trail, add a light rain layer and shoes with solid grip.